Tuesday, May 29, 2018

Python Program To Send Coordinate GPS to Server

Preliminary

This article continues a previous article about the use of GPS devices Ublox Neo 6M on Raspberry Pi. where in the previous article only discussed how to configure GPS Ublox Neo 6M on Raspberry Pi. This time it will be discussed how the python programming language used to transmit GPS coordinates which can to a server.

Before following this article, make sure you have configured the GPS device Ublox Neo 6M as in the previous article https://learning-raspberrypi.blogspot.com/2018/05/gps-on-raspberry-pi.html so this experiment can succeed. Python used here is using Python version 3, which is also present in the OS Raspbian Strecth. Here are the steps:

1. Install Python Library for gpsd

To access the GPS device Ublox Neo 6M there is python library that makes it easier is gpsd . You can check it on the following link.


to do python library installation can be done by using pip3 command as below:

pip3 install gpsd-py3

Make sure the install process has been successful, with the output as below:


2. Creating Python Scripts

Before creating a python script it's a good idea to try to test whether your GPS device gets a signal, by committing cpgs -s or gpsmon.

After you get the GPS signal. create a python script, the easy way that is with the terminal using nano:

nano tracker.py

Then create with the script below:

from datetime import datetime
import gpsd
import requests
gpsd.connect()
received = False
packet = gpsd.get_current()
try:
 pos = packet.position()
 received = True
except Exception:
 print("no signal")
 
if received == True:
 url = "http://your server address fill here/"
 lat = pos[0]
 lon = pos[1]
 tgl = datetime.now().strftime('%Y-%m-%d')
 wkt = datetime.now().strftime('%H:%M:%S')
 data = {'waktu':wkt, 'tanggal':tgl, 'lat':lat, 'lon':lon}
 r = requests.post(url=url, data=data)
 print (r.status_code)


Please note that sending data using POST method so that in PHP script on server need to take data with POST method, data is sent that is time, date, latitude and longitude. date and time data obtained from Raspberry Pi not from GPS data.

After creating the script as above. save the program by pressing CTRL + O and exit with CTRL + X.

To run the program that is with the command in the terminal as follows:

python3 tracker.py
If data is sent will produce output 200 which is code response that the request has succeeded

That;s sharing Raspberry Pi project from me, hope useful and good luck :)

Monday, May 28, 2018

Run Program's at Startup in Raspberry Pi


At a certain moment we may want to run certain programs or commands at startup or at first raspberry pi on turn on. This is needed when we want to not have to repeatedly run the same command or program, so raspberry pi will remember it to continue to run at startup.

The following example I will run 2 programs / commands that I usually type in the terminal, but the following will be executed when raspberry pi has power On. Example The command is running the command to direct the modem connect and run the gpsd program, following the command.

sudo gpsd / dev / ttyS0 -F /var/run/gpsd.sock
sudo wvdial apaaja &
for that there are several methods to run programs or commands at startup in raspberry pi but here I will only give you two method that I think the easiest to use, here's how:

1. edit the rc.local file

by adding commands to the rc.local file we can run certain commands at startup. First open the rc.local file with the following root permisions example using the nano editor program:
sudo nano /etc/rc.local
press enter and edit on the above exit 0 as follows:
#commands is running at startup
sudo gpsd /dev/ttyS0 -F /var/run/gpsd.sock
sudo wvdial apaaja &
exit 0
The above command example in the first command does not use the '&' sign at the end because the command does not contain looping or the process is not repetitive. Differences with wvdial commands are continuously running. So it needs to be given a suffix '&' is intended so that the command is given on different prosses and the boot process can continue to run.

Then to check it we can restart on raspberry pi. With command as follows:

sudo reboot

Additional: If we want to run a script that is in a particular directory then we need to mention the script file path to it completely. Suppose we want to run the program tracker.py in the directory / home / pi / Download then need to write as follows:

python3 /home/pi/Download/tracker.py

2. using crontab

crontab is usually used to run programs or commands that repeatedly time every time for example once every 5 minutes or 1 hour once, but the crontab can also be used to run the program at start up only. Here's how to use it:

1. open crontab with command

crontab -e

2. add the command by putting the word '@reboot' without quotes like the following example

@reboot sudo gpsd /dev/ttyS0 -F /var/run/gpsd.sock
@reboot sudo wvdial apaaja&

To find out we need to reboot raspberry pi.

if your need to debug your commands or program you can see log with running this following command :

grep cron / var / log / syslog

that two method which use to run commands/ programs at startup on Raspberry Pi. Thank You has read my article hopefully useful for you :)

Sunday, May 27, 2018

USB Stick Modem on Raspberry Pi


The use of IoT is very much in the world, many new researches or innovations using IoT as back bone or IoT technology rely on. So Raspberry Pi felt necessary to play this role. to get internet access on Raspberry Pi can use WiFi or can via LAN Adapter but what if Raspberry Pi is used on moving object. so internet is required from Telephone Operator SIM Card. for that one practical, easy and cheap way that is by using USB Stick Modem on Raspberry Pi.
before being discussed please note that the following test using Raspberry Pi 3 Model B and OS Raspbian Strech with USB Modem Stick Huawei E153. the following will be discussed how to use a USB stick as a source of internet on Raspberry Pi. here are the steps:
  1. Power On Raspberry Pi, then connect your USB stick modem to the USB.
  2. then the next step is we need to check whether the USB modem detected as Modem or CD ROM for it open terminal and type command as follows:
ifconfig -a
if the result is wwan0 then it is certain that the USB modem has been detected as Modem. like the following picture:


and for sure you can also check by doing the command:
lsusb


can be seen in the picture above there is Huawei's writings .... if not like above there is no wwan0 network so your USB modem is in CD ROM mode. for that need to do usb switch mode by further check on the following link: http://www.draisberghof.de/usb_modeswitch/ assuming we are already at the stage of USB Modem already regarded as a modem by Raspberry PI. Well we will do some installing software used.
sudo apt-get update
sudo apt-get install wvdial
do wvdial software installation with the above command, make sure not error. if you have finished installing wvdial do check with command below:
ls -al / dev / gsm *
it will detect the modem in USB0 as shown below:


meaning that the modem can already be configured and dialed. to configure it is to make editing wvdial.conf file in /etc/wvdial.conf directory, do the editing with the command as follows:
sudo nano /etc/wvdial.conf
according to the following configuration:

[Dialer Defaults]
Init1 = ATZ
Init2 = ATQ0 V1 E1 S0=0 &C1 &D2 +FCLASS=0
Modem Type = Analog Modem
ISDN = 0
Modem = /dev/ttyUSB2
Baud = 9600

[Dialer APNname]
Phone = *99***1#
Username = thenetuser
Password = thenetpw
; Username = 9180****** (If your provider use without Username)
; Password = 9180****** (If your provider use without Password)
Stupid Mode = 1
Baud = 460800
Init3 = AT+CGDCONT=1,"IP","APNname"

when finished configuring wvdial.conf, save it with the command ctrl + o and press Y and exit with the command ctrl + x to run wvial, just need to type wvdial commands on terminal like command below:
wvdial
and a modem with a SIM card inside will connect to the internet. :)

GPS on Raspberry Pi

Background

This article related to GPS, that is how to use GPS on Raspberry Pi. with the GPS Raspberry Pi is able to know the location coordinates on the map. the usual project using GPS is the tracker, by putting the Tracker Tool on a moving object, then we can monitor the movement on map from a distance. one example of a moving object that is Drone, by placing a tracker on Drone then Drone movement can be known through the view in the map.

This article only focuses on how Raspberry Pi can get GPS coordinates via GPS Nelo 6M Neo. for its development how to send GPS coordinate data to the server and how its server program is not described in this article.

Required device

1. GPS Ublox Neo 6M

is a GPS device that consists of 4 Pin: Vcc, GND, TXD, RXD. which sends data in serial form raw data in the form of standard language GPS, NMEA.

2. Raspberry Pi Model 3 B with Raspbian OS Stretch


Neo 6M Ublox GPS Connection to Raspberry Pi

GPS Ublox Neo 6M    --->   Raspberry Pi 3

VCC                            --->            VCC
RXD                            --->            TXD
TXD                            --->            RXD
GND                            --->            GND

Reference GPIO pin, you may be required find at picture below :


Software needed to install on Raspberry Pi

Gpsd, gpsd-clients, python-gpsd

is a GPS Handling Daemon tool, which can parse NMEA string data sent by GPS Ublox Neo 6M so that it can be read based on its size. for example we want to get the quantity of latitude and longitude.

with the gpsd library allows us to easily access the GPS position coordinates obtained by Ubunto Neo 6M device, without having to manually parse RAW NMEA data sent by GPS Ublox Neo 6M via serial.

to install on Raspberry Pi. can type the following command in terminal with Raspberry Pi condition has internet access.

sudo apt-get update
sudo apt-get install gpsd gpsd-clients python-gps

on Raspbian Jessie or later  you  need to disable as systemd service that gpsd install. this is for turn off automate connect gpsd to socket local so we can run gpsd manually. you can turn off with command below.

sudo systemctl stop gpsd.socket
sudo systemctl disable gpsd.socket

after you disable service you need run gpsd every you boot first login to Raspberry Pi to run command cgps -s or gpsmon.

Configuration on Raspberry Pi

1. Serial Port Configuration

by default serial on GPIO Raspberry Pi is used as serial console. so we can use serial on GPIO we have to disable serial console. for it can be done as follows:

a. backing up cmdline.txt settings 

with commands like the following

sudo cp /boot/cmdline.txt /boot/cmdline_backup.txt

backing up the cmdline.txt file is required so that if we want to restore the settings to the beginning with the old delete cmdline.txt and rename cmdline_backup.txt to cmdline.txt

b. edit cmdline.txt

 by removing the word console = ttyS0, to open cmdline.txt file in-terminal can be done by using nano program with command as follows:
sudo nano /boot/cmdline.txt
after the opened cmdline.txt file is terminated, search console = ttyS0 and delete it. then exit and save by pressing CTRL + X then Y

after cmdline.txt is edited then it is necessary to reboot Raspberry Pi. to reboot can be used command
sudo reboot

c. connect serial port ttyS0 to socket gpsd 

before you continue to connect ttyS0 to socket gpsd, you can check wheter GPS send data to serial ttyS0 you can check via command below :

cat /dev/ttyS0
if there is a stream of NMEA data on the terminal, then it can be sure that RAW data from GPS Neo 6M can be used. if any so mean GPS work well.

so continue to connect socket gpsd to serial ttyS0 with command below :

sudo gpsd /dev/ttyS0 -F /var/run/gpsd.sock

2. gpsd default configuration

in order to use the cgps -s command to display NMEA data it is necessary to set up gpsd file in path / etc / default / gpsd adjust the device with ttyS0 as follows:
START_DAEMON="true"
GPSD_OPTIONS="-n"
DEVICES="/dev/ttyS0"
USBAUTO="false"
GPSD_SOCKET="/var/run/gpsd.sock"

after editing as above then saved.

How to access Ublox neo 6M

1. gpsmon

by typing commands like the following:

gpsmon

then it will appear data from GPS Ublox Neo 6M is readable in the form of easy to read.


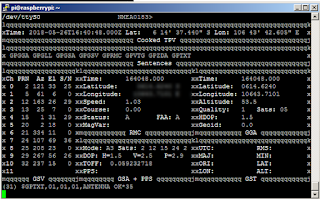
2. with the command cgps -s

besides with gpsmon can also with command cgps -s note that this command setting is in file / etc / default / gpsd as before in configure display command cgps -s that like as follows:

cgps -s
output like picture below :


so tutorial using GPS Ublox Neo 6M on Raspberry Pi 3 model B with OS Raspbian Strecth.

thank you ..... having fun with your experiment ...

Friday, May 25, 2018

Remote Desktop at Raspberry PI


so if you who wanted remote desktop at Raspberry Pi. there is possible to do that which be will describe in this article. remote desktop allowed us to remote by GUI Raspberry Pi like picture at above. Remote desktop on Raspberry Pi used for you who know how look about GUI Raspbian at Raspberry Pi if you dont have monitor. so let's do that.

the first we do is access terminal Raspberry Pi with remote as ssh. if you dont know about remote ssh, you can read my article before at my link setup wifi and ssh and also raspberry pi have access internet.

Following steps that friends need to follow to configure Raspberry PI via terminal:

1. Install VNC Server on Raspberry Pi

to install VNC server we just need to type the following command in the terminal

sudo apt-get update
sudo apt-get install tightvncserver

sudo apt-get update is used to update the repository list. while on the next line is a command to install VNC Server. if any question do you want Continue Y / n? answer with Y and enter

2. Run VNC Server on Raspberry PI

make sure the install process runs perfectly without any error. after VNC Server is installed it needs to run. to run it can by typing the following command in the terminal.

vncserver

when first run, then we are prompted to create a password to enter Raspberry PI via Remote Desktop VNC from another computer.

You will require a password to access your desktops.

Password:

enter a password that you can easily remember, then press enter

then input the password again to verify.

then there will be a question whether the need for a password for view-only, you  may fill Y or n
when finished then there will be notification as follows:


New 'X' desktop is raspberrypi: 1

 
Creating default startup script /home/pi/.vnc/xstartup

Starting applications specified in /home/pi/.vnc/xstartup

Log file is /home/pi/.vnc/raspberrypi:1.log

this means that vncserver is already running on port 1.

3. install VNC Client on Computer / Laptop

to remote we need to use VNC Client application one of them you can use application from TightVNC at the following address:


there are two options for both 64-bit and 32-bit versions. after the download and then install.

when the prosess install in the Choose Type select Type select with Custom then for TightServer in select Entire Feature will be unavailable. because all we need is an application viewer.

after successfully install. friends can try it directly, open the TightVNC Viewer app on the remote host field input Raspberry IP PI follow with ": 1" example eg Raspberry IP PI 192.168.1.13 then when the remote host 192.168.1.13:1

then click Connect then will appear field for the password, you can input password that you make when first configure VNC Server in Raspberry PI. then click OK

when successful will pop up windows for Raspbian Raspbian Raspberry PI display.

so much sharing from me hopefully useful :)

Monday, May 21, 2018

How to Setup WiFi and SSH at Raspberry PI without monitor


What do you do if you want to access raspberry pi but do not have monitor? one of the ways that is can remote ssh. what is ssh ?

remote ssh can be briefly explained that a remote computer from another computer via terminal. at Raspberry Pi to be do remote ssh, computer at another side have to one network with Raspberry Pi. so if you want to connect Raspberry Pi to WiFi network, it can be done with configure by file in situation you don't have monitor.

to access partition Raspberry Pi at Linux, it can be easy, because Raspberry Pi partition easily can be read. at windows to read Raspberry Pi partition you have to install third party software, one of them ie paragon software. you can get on below link :

https://www.paragon-software.com/home/linuxfs-windows/

at Raspberry Pi  by default any two partition ie : boot and root, boot have file system FAT so in both Windows and Linux environment it can be access. root partition have file system EXT ie file system Linux based, this partition which only access at Linux environment so at Windows environment you have install third party to access file system ext at Windows. i use paragon software and easily access partition Linux at Windows environment.

if you done can access partition both root and boot so the below step by step configure Raspberry Pi to be remote by ssh.

1. connect Raspberry Pi to WiFi network


to do this. quite easily friends just go to the root partition and visit the file in /etc/wpa_supplicant/wpa_supplicant.conf open it with notepad and add at the bottom of the following syntax :

network={
    ssid="testing"
    psk="testingPassword"
}

ssid is filled with WiFi name and psk is filled with WiFi password. if the WiFi Transmitter there is no password then simply input the writing as follows:

network={
   ssid="testing"
   key_mgmt=NONE
}


if you have added the above text according to their respective configuration then save.


finished setting for WiFi configuration then go to second step.


2. Enable SSH at Raspberry Pi

for security reasons by default Raspbian will disable or disable the ssh feature. so we need to enable ssh by file. the steps are quite easy. you just need to create a blank file called "ssh" (without quotation marks) without esktension and is a blank file put on the outer partition boot. just need it.

3. Operate SSH 

when the two steps have been done, then the SD Card is ready to put into Raspberry PI and power - on.

when Raspberry PI is On. wait a while until Raspberry PI connect WiFi or tethering network and do ssh with software your favorite, one of them can with putty. to use fill host name with ip address Raspberry Pi registered on network. to know that you can use Angry IP Scanner software to scan WiFi network. Raspberry hostname by default is raspberrypi.local, port default is 22. if done you can click open button on putty.

you will meet the console which ask login username, by default it is pi and the password is raspberry.  after that you will enter to terminal which terminal at Raspberry Pi open by remotely.

that is my articles. hopefully useful.


Sunday, May 20, 2018

7 Basic Things About Raspberry PI


A basic question that might be some people asking what is Raspberry Pi ?

In short Raspberry Pi is a computer in amount of credit cards. where there is already a computer system inside it that is microprocessor , RAM, and I/O.

from the first time out, Raspberry PI changes in terms of technology inside it that adds the ability eg processor speed and RAM capacity as well as the addition of other peripherals such as BlueTooth and WiFi Adapter.

the last version of raspberry pi is Raspberry PI 3 B + with the specs of Broadcom BCM2837BO processor, Cortex-A53 (ARMv8) 64-bit SoC @ 1.4GHz. 1 GB RAM, there is bluetooth, WiFi Adapter, USB, LAN, HDMI and so forth.

But before Raspberry PI like now, there are 7 basic things you need to know about Raspberry PI.

1. Created for the first time by the Raspberry PI Foundation


Raspberry PI Foundataion is a charity which build for purpose reintroducing basic computer systems in schools in the UK and in developing countries. 

The idea behind Raspberry PI is to produce generation of programmers like the microcomputer revolution of the 1980s. although the first goal is to teach to schools, but in reality now most Raspberry PI is used in the field of robotics and automation also in the field of IoT.

2. Name Raspberry PI consists of two words namely Raspberry and PI


Raspberries are inspired by well known vendors who use fruits as a brand for example Apple, Blackberry, Apricot. while PI stands for Python.

because the first time Raspberry PI was made to have a Python interpreter inside. so for the development of Raspberry PI itself it feels better to use Pyhton module for tools programming, but like most linux OS, Raspbian Raspbian PI is also available in other programming languages such as C + +, C and others.

3. Raspberry processor PI uses the same processor on a Smartphone that is ARM


because the processor using ARM, then the OS that may be installed is a Linux-based,

different from Microsoft Windows OS designed for computer system type with processor of x86 architecture. but there are already Windows 10 IoT that can be installed on Raspberry PI.

4. Small but incredibly capable


with the size of a credit card. Raspberry PI is capable of providing capabilities such as running word processing programs, spreadsheets, watching movies with HD quality with HDMI output capable of providing resolutions up to 1080p.

5. Evolve quickly


The ability of Raspberry PI 3 is 10 times the performance of Raspberry PI first generation. with this ability Raspberry PI is able to adapt to the needs of computing needs to evolve constantly.

6. There is no RTC or Real Time Clock on Raspberry PI


programs running on Raspberry PI can take time from Network Time Server or user input when first booting.
for the purposes of Raspberry PI file system save time when shutdown. and use it again at start up. there is an external RTC module that can be connected to I2C.

7. There is GPIO or General Pin Input Output


GPIO is an I / O that we can program with Pyhton programming language to extract High and Low data,

same as in microcontroller. so even though Raspberry PI can be used in high applications. but not forgetting to provide facilities to provide a low Pin I / O programming. with this we can make Led application running as often used in microcontroller and Arduino.

It is the 7 basic things about Raspberry PI that I can convey on this occasion. hopefully provide additional knowledge to new learners or use Raspberry PI. with the initial goal of noble manufacture to encourage a new generation of computer system learning. let's use Raspberry PI to realize the ideas in the field of computer systems to encourage the advancement of knowledge in the field of computer systems.

Sunday, May 13, 2018

How to install raspbian stretch on raspberry pi


There are several (more than one) ways to install Raspbian on Raspberry PI, but there is one way that I like, because it is relatively easy, and often works to this day. 

I personally often use memory sd card size 16 GB, so if you have a smaller I suggest to use a minimum sd card size 8 GB, because my experience the size of the Raspbian file itself when extracted about 4GB.


environment to make this Raspbian OS using Microsoft Windows 7. lets directly we start to install Raspbian Strecth on Raspberry PI.

1. Reformat SD Card


To reformat the SD Card memory, I usually need a software, which I do not know why from the beginning I always use to install this Raspbian. software that I can derive from the following URL:


the name of the SDFormatter software.  You can download, then install and use to re-format SD Card, the option format I use is: QUICK FORMAT, FORMAT SIZE ADJUSTMENT OFF after that you can click the format and wait for it to finish.

2. Download / Download Raspbian Image


The Official Raspberry PI site provides an image for the Raspbian OS, along with links to download various OSs that can be installed on Raspberry PI


select Raspbian and the image to be downloaded is large which is about 1.7 GB

3. Write the Raspbian Image file to SD Card memory


to write this image file required Win32DiskImager software that you can download on the following sites:


after finished install then open the software. how to use it is on the image column select the image Raspbian that has been downloaded and then extracted and become a .img file. this .img file is inserted into the image field.

then in the Device field select Drive memory SD Card located. remember you dont choose the wrong drive! because it will cause the wrong format.

after making sure the two columns are correct then execute by pressing the Write button.

then Wait for it to finish.

4. Plug into Raspberri PI

when done. remove the SD Card memory from your computer / laptop, then input to Raspberry PI and turn on Raspberry PI. it will Raspberry PI will install Instant OS Raspbian.


it was 4 ways to install Raspbian on Rasberry PI in Windows environment. May be useful...